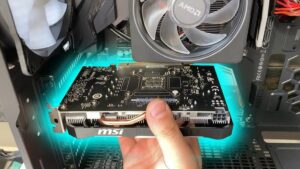
Removing a GPU (Graphics Processing Unit) from your motherboard is a straightforward process, whether you’re upgrading to a new GPU or performing maintenance. In this guide, we’ll walk you through the steps to safely remove a GPU from your motherboard, along with tips on handling and storage.
Table of Contents
- Introduction to GPUs
- Why Remove a GPU?
- Tools You May Need
- Steps to Remove a GPU
- Handling and Storage
- Conclusion
- External Resources
Introduction to GPUs
A GPU, or Graphics Processing Unit, is a critical component that renders images, videos, and animations on your computer screen. It plugs into the motherboard via a PCIe slot and is essential for gaming, video editing, and other graphics-intensive tasks.
For more on GPUs and their role in your PC, see our comprehensive guide on what a GPU does.
Why Remove a GPU?
You may need to remove a GPU for several reasons:
- Upgrading: Installing a new, more powerful GPU.
- Maintenance: Cleaning dust or replacing thermal paste.
- Troubleshooting: Testing with a different GPU to diagnose issues.
Tools You May Need
Before you begin, gather these tools:
- Phillips screwdriver: To remove screws holding the GPU in place.
- Antistatic wrist strap: To prevent static electricity damage.
- Compressed air: For cleaning dust from the PCIe slot.
Steps to Remove a GPU
Step 1: Power Down and Disconnect
- Shut down your computer and power off the PSU (Power Supply Unit).
- Disconnect all cables connected to the GPU, including power connectors and video output cables.
Step 2: Remove Case Side Panel
- Lay your computer on a flat, stable surface.
- Use a Phillips screwdriver to remove the screws holding the side panel of your case.
Step 3: Unplug Power Connectors
- Locate the power connectors on the GPU.
- Press the release tabs or pins and gently unplug the connectors from the GPU.
Step 4: Release Retention Mechanism
- Identify the retention mechanism holding the GPU in place.
- Depending on your motherboard, it may have a latch, clip, or screws securing the GPU.
Step 5: Gently Remove GPU
- Hold the GPU by its edges and gently lift it out of the PCIe slot.
- Avoid touching the gold contacts on the bottom of the GPU.
| Step | Action |
|---|---|
| Power Down and Disconnect | Shut down PC, disconnect all cables |
| Remove Case Side Panel | Use screwdriver to remove side panel |
| Unplug Power Connectors | Release and disconnect power connectors |
| Release Retention Mechanism | Undo clips or screws securing GPU |
| Gently Remove GPU | Lift GPU out of PCIe slot carefully |
Handling and Storage
- Antistatic Bag: Store the GPU in an antistatic bag to protect it from static electricity.
- Cool, Dry Place: Store in a cool, dry place away from direct sunlight.
- Avoid Dropping: Handle with care to avoid physical damage.
Conclusion
Removing a GPU from your motherboard is a simple process that can be done with basic tools and careful handling. Whether you’re upgrading, cleaning, or troubleshooting, following these steps ensures that you can safely remove and reinstall your GPU without any issues.
For further information on installing a GPU or troubleshooting GPU-related problems, visit our guide on how to install a GPU.

